Tuesday, October 28, 2014

A Simple Roasted Garlic Spread

Time for my debut on the Food & Travel blog! I figure that since Carly and I are married now, we're basically the same person, and I can start contributing a little around here.

That's right, it's Bryan Dannowitz here, and I'm here to share with you an easy people-pleasing recipe that's sure to satisfy the taste buds. It being almost Halloween time, it's also sure to repel those glittering, blood-sucking vermin; those long-toothed night walkers. Yes, this is going to be pretty much pure garlic.

My father once told me "Son, if you find yourself with a woman who doesn't like garlic, then find a new woman." I always thought that this 'Dannowism' was cute, but then I grew up and remembered that my mother didn't like garlic, and, well... we all know how that went. Needless to say, that saying lost a bit of its charm. Regardless, I find myself lucky to be married to a woman that embraces the all-empowering flavor that is garlic.

So, we begin with raw garlic heads. My dad has begun growing his own garlic in his oversized backyard garden. He also buys artisan breeds of garlic from a co-worker who is a garlic enthusiast. Lucky for us, he will often generously send us home with a bag of 10 to 20 heads of garlic. The only issue is: for a household of only 2 to 3 people who cook maybe one meal a day, how do you use 20 heads of garlic?  An easy answer is to make yourself a roasted garlic spread.

All you'll need is:

  • 4 heads of garlic
  • 1/8th to 1/4th cup olive oil
  • Salt and pepper, to taste
  • 1/2 tsp minced rosemary, or your herb of choice
  • (optional) a glass of bourbon and a sweet funk playlist to kill the 45 minutes this will take to cook
First off, preheat your oven to 375°F.

Take your garlic heads and a nice sharp knife and cut them a little higher than their mid-height point.


Now, just nestle those heads in a little square of aluminum foil and drizzle some olive oil over the cut tops, just enough to coat them nice and good. If you accidentally pour too much, don't worry, I'm pretty sure it'll only end up tasting even better. Then, wrap them up nice and tight in that foil.

I always think that in this state, they look like robot heads of garlic, don't you think?

In the rare case you actually find robot garlic, do not ingest.

Now, here's where you're going to get the good stuff. The advice that goes above and beyond. You see, if you're working with more than two heads of garlic, it's but a fool who throws away the tops of these heads. My friends, there's gold in them hills. Go back over them and pop out the nuggets of garlic that you've cut off. We're going to use those puppies, too.

Yes, all this goodness is left in the tops!

Wrap up your aggregated left-clovers into some foil, add some oil, and add it to the bunch. Then, throw it into the oven and set your timer for 45 minutes.

While you wait, I recommend throwing 2 oz. of bourbon and 1 oz. of sweet vermouth into a tumbler with some ice, stir till mixed and chilled, and then add a few drops of angostura bitters, and enjoy while you wait.

Also, while you pace in circles, you can prepare the last major ingredient of the mix. In my case, I want to use rosemary, because we paid like ten dollars for this plant in the spring and have barely used it. Feel free to use parsley or thyme or whatever herb you needlessly spent money on. 


For a powerful substance like rosemary, I recommend 1/2 tsp per 4 heads of garlic. If you use something else, you're going to have to come up with your own rules, you rogue.

Now, that ear piercing oven alarm goes off, and it's time to pull the garlic out and let it cool a bit. When it's cool enough to handle, peel the foil back to find the cloves of garlic nice and browned and soft like this:

Should be as soft as smelly mashed potatoes at this point

Go through and squeeze out all the roasted cloves of garlic into a bowl. Oh yeah, and if you decided not to wear gloves for this recipe, your fingers won't stop smelling like they do for the next 12-24 hours.

You'll end up with a bowl that looks like this:

Not shown: the rainbow that ends just above this bowl

All that's left is to mash it all up with a fork and add the rosemary, salt, and cracked black pepper.

Serve it however you want, on whatever you want. On a cracker, on some bruschetta bread, add it as a garnish to some appetizer, or, heck, put it in a popsicle mold and freeze away for a delightful summer treat.

Cheers.

And if anybody is upset about me making a blog post about something as simple as roasting garlic, think to yourself -- shouldn't we take it upon ourselves at every opportunity to raise awareness of the effortless delight that is roasted garlic? Yum.

Now, if you don't mind, I will welcome my wife home with a garlicky fresh kiss, as I relinquish back to her control over her blog.

See you next time, everyone!

- Bryan D.


Our Travel Themed Wedding

I've been married for a little over a month, and yes I know how 8th-grade that sounds. But now that the dust has settled I decided to document my thoughts on the whole wedding planning process and the emotions that come along with it. Here are a few pictures from our big day, along with the story of how we got there. Be prepared, this is a long post. 


Homemade wine for the hotel rooms. The crane is a nod to my Japanese heritage

Bryan and I had been engaged before, and we broke it off. There were many contributing factors to this decision, and one of them was the stress of wedding planning. We were ambitious enough to think we could pull off two weddings, one in each of our home states. This way those who could not travel could still be a part of our big step without spending 8+ hours on an airplane. So much for that idea. 


Our ceremony site with origami crane altar pieces and wine box

The second time around I was very anti-wedding. The anxiety and bad memories of wedding planning the first time around were enough for me to swear off the project. Not to mention the financial obligation that comes along with weddings. Long story short, I wanted to do a destination wedding. But we bit the bullet and decided for something traditional with a few simple modifications. 

Our sweetheart table was framed by a window overlooking a grassy knoll of the Arboretum with our altar pieces on either side of the table

Drama: It is incredibly difficult to plan a wedding, stay on budget and get everything you want. It is even more difficult to not get swept up into all of the drama. Some couples have family drama, some couples have friend drama, but I can almost guarantee you that if you have a wedding you will get caught up in silly-insignificant-detail drama. Such as the shade of roses on the corsages or the size and shape of the centerpiece vases or the amount of tomato on the hors d'oeurves. 

It's all silly and just makes you stressed out for no reason. You don't even notice it on your wedding day, or at least, you shouldn't. But when you're planning, you get into this mentality of, "If I'm paying for it, it better be what I want." My husband introduced a saying to me that he adopted from his mother: "This is not a hill that I want to die on," meaning, it's not that important and it's time to move on.

In the end, all you can do is prioritize and downsize. Find a few things that you truly care about and simplify the rest. Like get a great photographer and nix the three foot tall centerpieces. Get the good suits and opt out of garters and cake knives. 

Card box

Theme: One thing I am very proud of was our theme. I wanted something that summed up our hobbies and lightly incorporated our personalities. Originally, I wanted to get married at a vineyard and have a wine theme. But when we visited the Morton Arboretum, I fell in love with it's beauty and decided on a different approach.

If you haven't guessed, we went with a travel theme. Thanks to my job, we have blessed to see the world and we take full advantage of it. Our love for travel preceded our relationship with trips to California, Nevada, Washington DC, Florida, Colorado, even Europe. We had seen so much of the world and there is still so much left to see. Now we get to do it together.

Centerpiece with table number and favors

We added little touches of flair to incorporate our theme. I didn't want our wedding to be a huge production. More like a classic yet causal gathering with hints of personality. We kept most things neutral and let the colors and vintage items speak for themselves. 

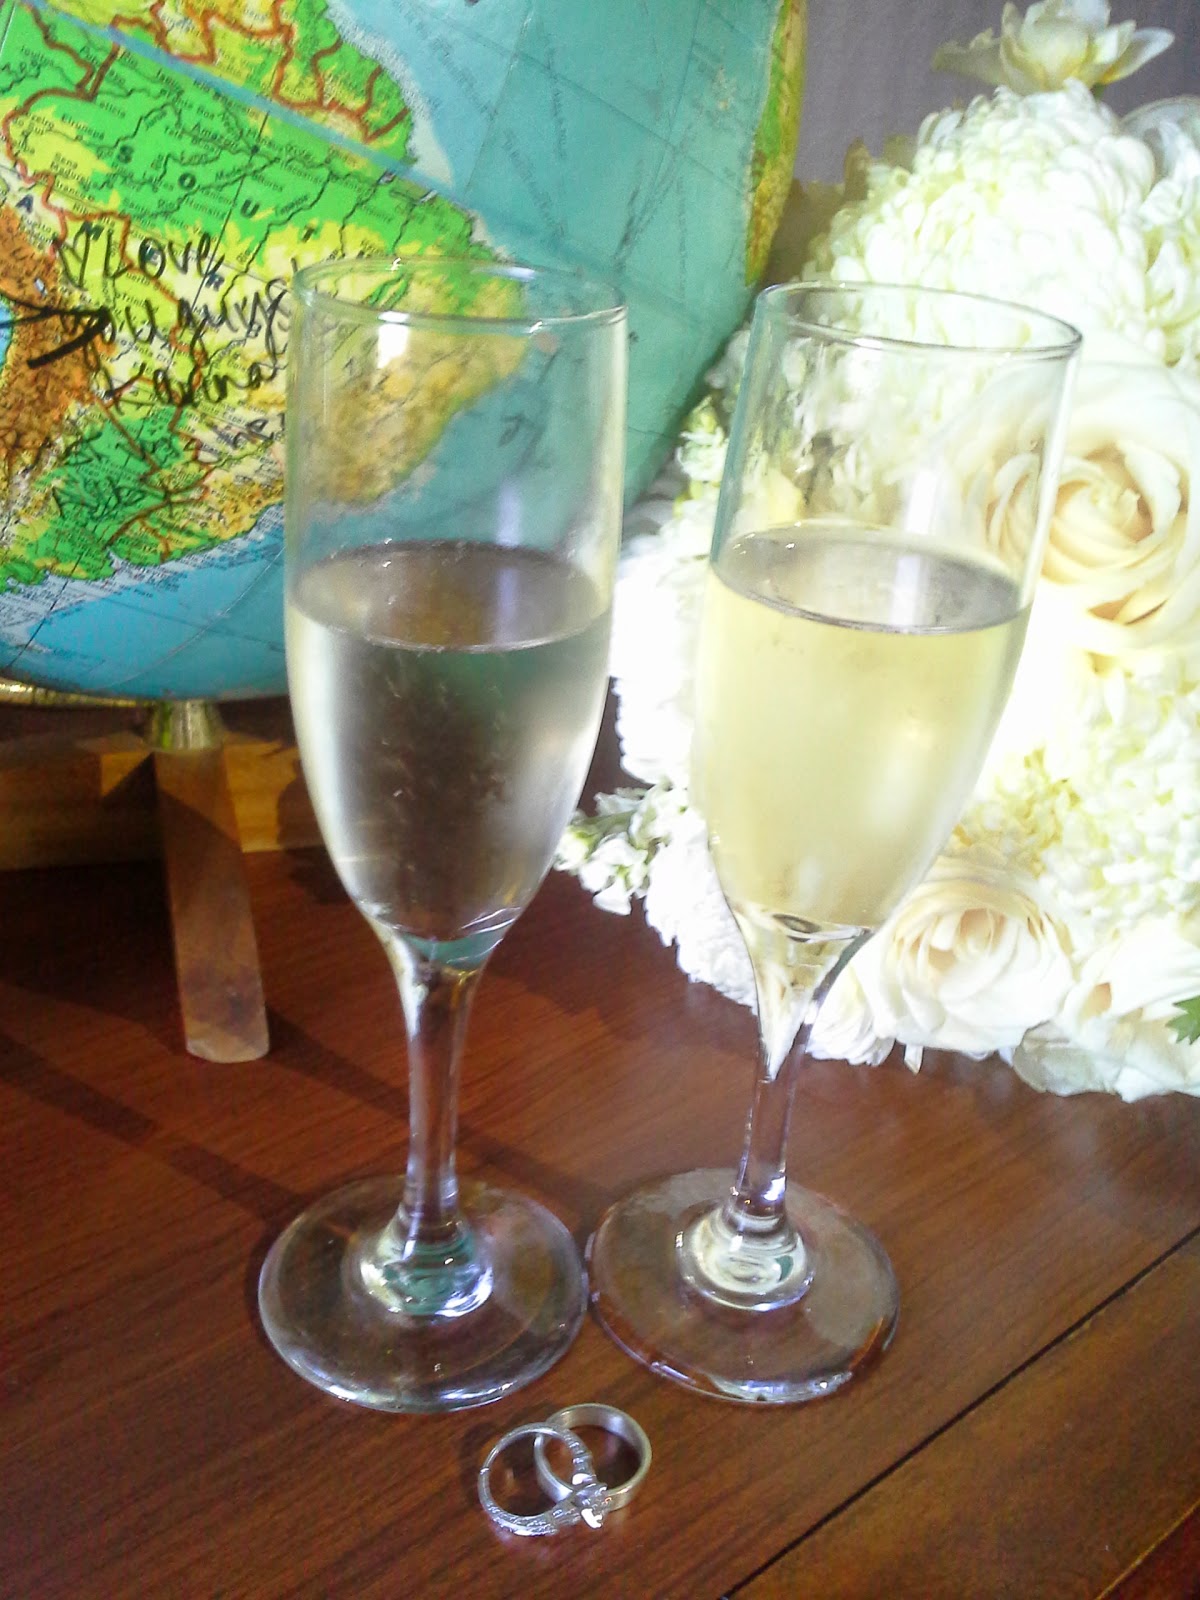
Champagne, rings, bouquet and "guestbook"

Our guestbook was my Mother-in-law's vintage childhood globe, and guests could sign on any state, country or body of water they wished. Our centerpieces consisted of purple and ivory flowers in square vases, including a Japanese style mum. Vintage postcards of places we traveled to together acted as table numbers. Guests received luggage tags as place cards and favors. Our card box was a vintage luggage set with luggage tags / favors that read, "Just Married." Finally, our cake was in the shape of a suitcase with a more traditional cake sitting on top of it. It was finished with a simple monogram and I felt is captured the feeling of our event perfectly. 

Cutting the suitcase cake

Maids and Men: For the bridal party, I wanted things to be intimate and practical. Two groomsmen, two bridesmaids. My girls were beautiful in their floor-length aubergine dresses with a lace shoulder and back. The boys wore classic charcoal grey suits, white shirts and purple ties to match the girls. Everything we bought for the bridal party was classy, elegant and completely reusable. No rentals, no "bridesmaid" looking dresses. My motto for attire was, "This is a wedding, not the prom."

My lovely bridesmaids and myself waiting to walk down the aisle

Gifts: I tried to keep many gifts sentimental and intimate. Nothing to bulky or fancy. After all, everyone was traveling several miles to get to the wedding, nothing could be perishable or fragile. To keep with the travel theme, maids received necklaces with pendants of their home states with a heart over their home town. For my groom, I gave him custom cuff links with a map of Chicago (where he grew up) and Central Illinois (where we currently live). 

Home state necklaces for the girls

Cuff links for the groom


Brunch: Our decision to have a daytime wedding was three-fold. Firstly, the venue was booked for that night, so only Saturday afternoon and anytime Sunday were available. Secondly, the wedding would have cost twice, if not three times as much if we had booked it for nighttime. Lastly, everyone likes brunch. When you are combining a large group of people from all different parts of the country, it can be hard to please them. But we figured most American people eat the same kinds of breakfast foods. 

We had people that were gluten-intolerant, vegetarians, carnivores, fish eaters, non-fish eaters... you name it, we had it. Our menu was a balance of different items that could accommodate even our pickiest of guests. Yet it all remained cohesive thanks to the brunch blanket.

We served fresh fruit, spinach salad, roasted potatoes, bacon, Eggs Benedict, smoked salmon and bagels, and the hit of the day crème brûlée french toast. Something for everyone.

Noms

Bringing two families together: I wanted to bring some ethnic traditions into our wedding. After all, it's tradition. We didn't want the traditions to be ignored or to be overwhelming, just a little dusting to make the day more personal. 

I folded 1,000 golden paper cranes and strung a few of them on thread to create a garland. Our florist then draped these cranes onto our altar pieces and they shimmered in the sunlight. Other touches included Japanese mums, and a Hawaiian Koa wood mirror my dad handmade. We also did a Japanese-Hawaiian traditional toast known as the Banzai. Everyone was great to participate and the enthusiasm was much appreciated. 

 
Toasting during the Banzai

Thanks to the love and support from our families we were able to pull off an amazing day full of love and laughter. That sounds kind of like a Hallmark card, but it's true. Despite crazy airport drama, hours of organization, and hectic planning from a distance we managed to pull it off. 

Me and my new husband and new siblings

Bryan handing the paper crane garlands to the little ones

Combo Father-Daughter, Mother-Son dance

Grandma and all of her grandchildren

Swing dancing with Grandma


I want to thank everyone who came to our wedding and a special thanks to everyone who helped make our day as smooth and as stress-free as possible. I've heard many horror stories of couples who could not enjoy their day because they had to micromanage, wardrobe malfunctions, had bad vendors, or who didn't get to eat. I was hesitant at first, but we were lucky to have a wedding that can only be remembered as the best day of our lives. 


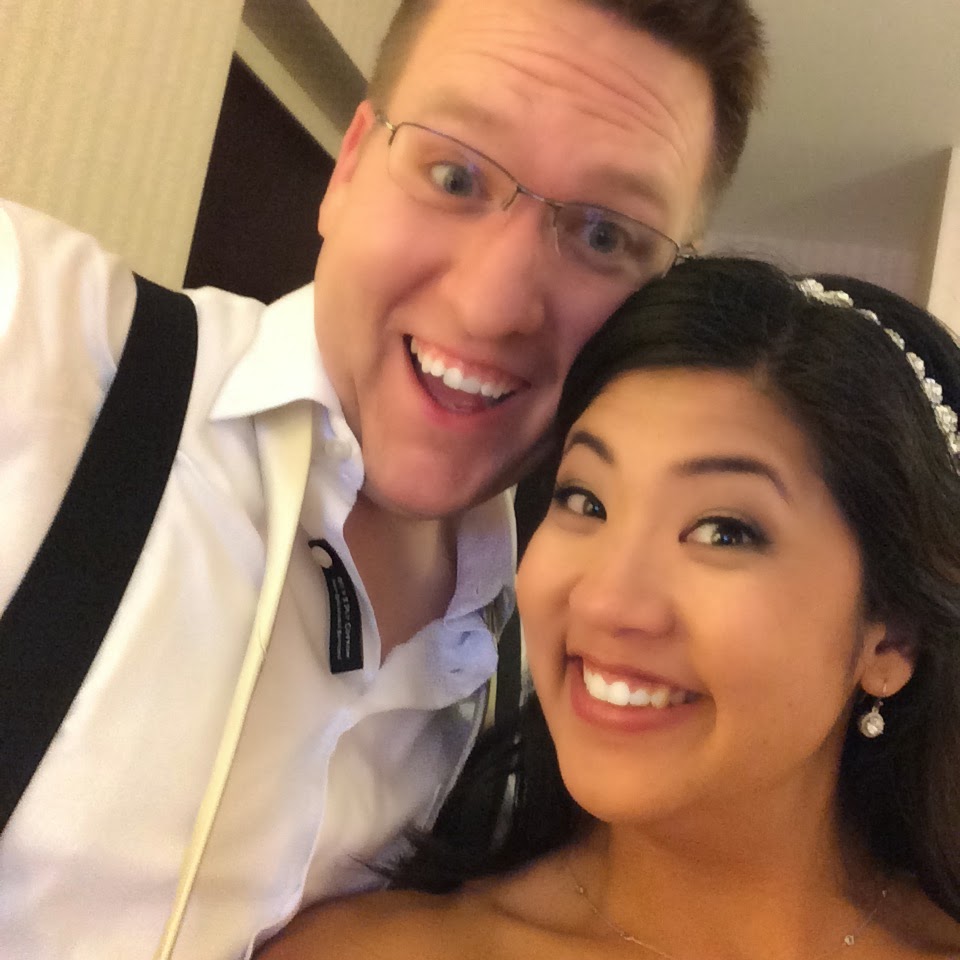
Don't forget that first selfie as a married couple!


-Akemi-chan

Friday, October 24, 2014

Month long break

We're back from our honeymoon. So basically a took a month long break from blogging. I'll be up and running in a few days, but until then, I'll just have to get used to being a Mrs. Wedding and honeymoon posts soon to come.